
Tutorials
How to Change The Default WooCommerce Order Status
Jun
Are you looking to add extra order status options to your WooCommerce store? WooCommerce already offers seven default order statuses that’ll allow you to manage your online storefront effectively – but there’s a distinct advantage in tailoring your order statuses to the specific needs of your customers. Extending and customizing these statuses can significantly enhance the user experience, boost sales, and foster customer loyalty.
This article will unravel the basics of WooCommerce‘s default order statuses and guide you through adding more using the powerful WooCommerce plugin, Flow Notify.
Whether you’re just getting started or looking to optimize your WooCommerce store further, we’ll cover everything you need to know about customizing your WooCommerce default order statuses. Let’s get started!
Understanding default WooCommerce order statuses
WooCommerce order statuses are an invaluable part of any eCommerce store’s toolkit. They help you keep track of each order’s progress and communicate updates to your customers. By understanding and effectively utilizing these statuses, it’s possible to streamline your order management process, enhance customer communication, and ultimately drive efficiency in your online store operations.
There are seven default WooCommerce order statuses, each serving a specific purpose in the order management process. Here’s a brief overview of all seven statuses and when they’re typically used:
- Pending payment: This status indicates that an order has been received, but the payment is yet to be confirmed.This is usually the initial status for orders that require manual payment (like bank transfers or checks.)
- Processing: The processing status means that the payment has been received and the order is now being prepared for shipment. This status is commonly used for orders that require inventory handling, packaging, or other pre-shipping tasks.
- On Hold: An order with the “On Hold” status requires further action from the store owner or customer before it can proceed. These orders might require additional information, payment verification, or administrative input.
- Completed: This status applies to paid orders that have been fulfilled. As a result, this status is typically applied once an order has been shipped and delivered to the customer.
- Canceled: If the store owner or customer has canceled an order, it’ll be marked with this status. It’s important to note that canceled orders cannot be resumed, and a new order must be placed if the customer wishes to proceed with the purchase.
- Refunded: The refunded status indicates that a customer’s payment has been returned, either partially or in full, and is used when a customer requests a refund or when a store owner initiates a refund due to product issues or other reasons.
- Failed: A failed status is assigned to orders that could not be completed due to payment issues, such as declined credit cards or other payment processing errors.
Changing default order statuses in WooCommerce
While some order statuses in WooCommerce, such as ‘Pending Payment’, ‘Failed’, ‘On Hold’, and ‘Processing’, are automatically updated, others like ‘Completed’, ‘Canceled’, ‘Refunded’, or any custom statuses need to be updated manually. However, WooCommerce auto-completes orders for downloadable products, so you won’t need to intervene manually.
Below, we’ll guide you through the process of changing order statuses in WooCommerce, either manually or via automations.
How to change the status of a single order manually
- From your WooCommerce dashboard, navigate to WooCommerce > Orders.
- You’ll see a list of your orders and their default status – like ‘pending payment’.

- To change the status manually, click on the order, which will bring you to an ‘Edit order’ page.
- From there, select the relevant order status from the dropdown menu under Status.

- Remember to click ‘Update’ to save your changes.
How to bulk edit order statuses manually
- From your WooCommerce dashboard, navigate to WooCommerce > Orders.
- Check the boxes next to all the orders you want to bulk edit.
- Then, click the ‘Bulk actions’ dropdown and select the status you want to change your orders to.

- Finally, click the ‘Apply’ button next to the Bulk Actions dropdown to update your selected orders.
How to automate order status changes
If you’d prefer not to make changes manually, you can use plugins to automate the process. One of these handy plugins is Order Status Rules for WooCommerce, which can schedule automatic WooCommerce order status changes according to preset conditions.
For virtual products, a plugin like WooCommerce Order Status Control can automatically change the order status to Complete once payment has been made.
Benefits of creating custom order statuses
WooCommerce’s default order statuses serve their purpose well but can be limited in flexibility and detail. What’s more, they tend to provide generic communication instead of the personalized experience your customers expect. On the other hand, custom order statuses can improve your store’s efficiency, workflow management, and customer experience with tailored communication.
And that’s not all – here are some more advantages of creating custom order statuses:
Improved workflow management
Custom order statuses give you more control and clarity over your store’s workflows. In addition, these statuses allow for more specific, tailored information, reflecting every stage of your unique business operations.
For instance, introducing statuses such as ‘Awaiting Dispatch’ or ‘Packaging in Progress’ can give you a clear window into your internal procedures, aiding in streamlining tasks. By allowing you to visualize every phase in your order progression, these custom statuses become invaluable tools, helping you identify bottlenecks and ensure a smooth and efficient workflow across your team.
Enhanced customer communication
When it comes to maintaining strong relationships with your customers, transparency is vital. Custom order statuses can be an effective tool for enhancing communication with your customers.
By creating unique and descriptive statuses, you can keep your customers updated on the precise stage of their orders. This transparency builds trust and reduces the likelihood of customers contacting you with queries about their order status, freeing up your customer service team for other tasks.
Automated updates
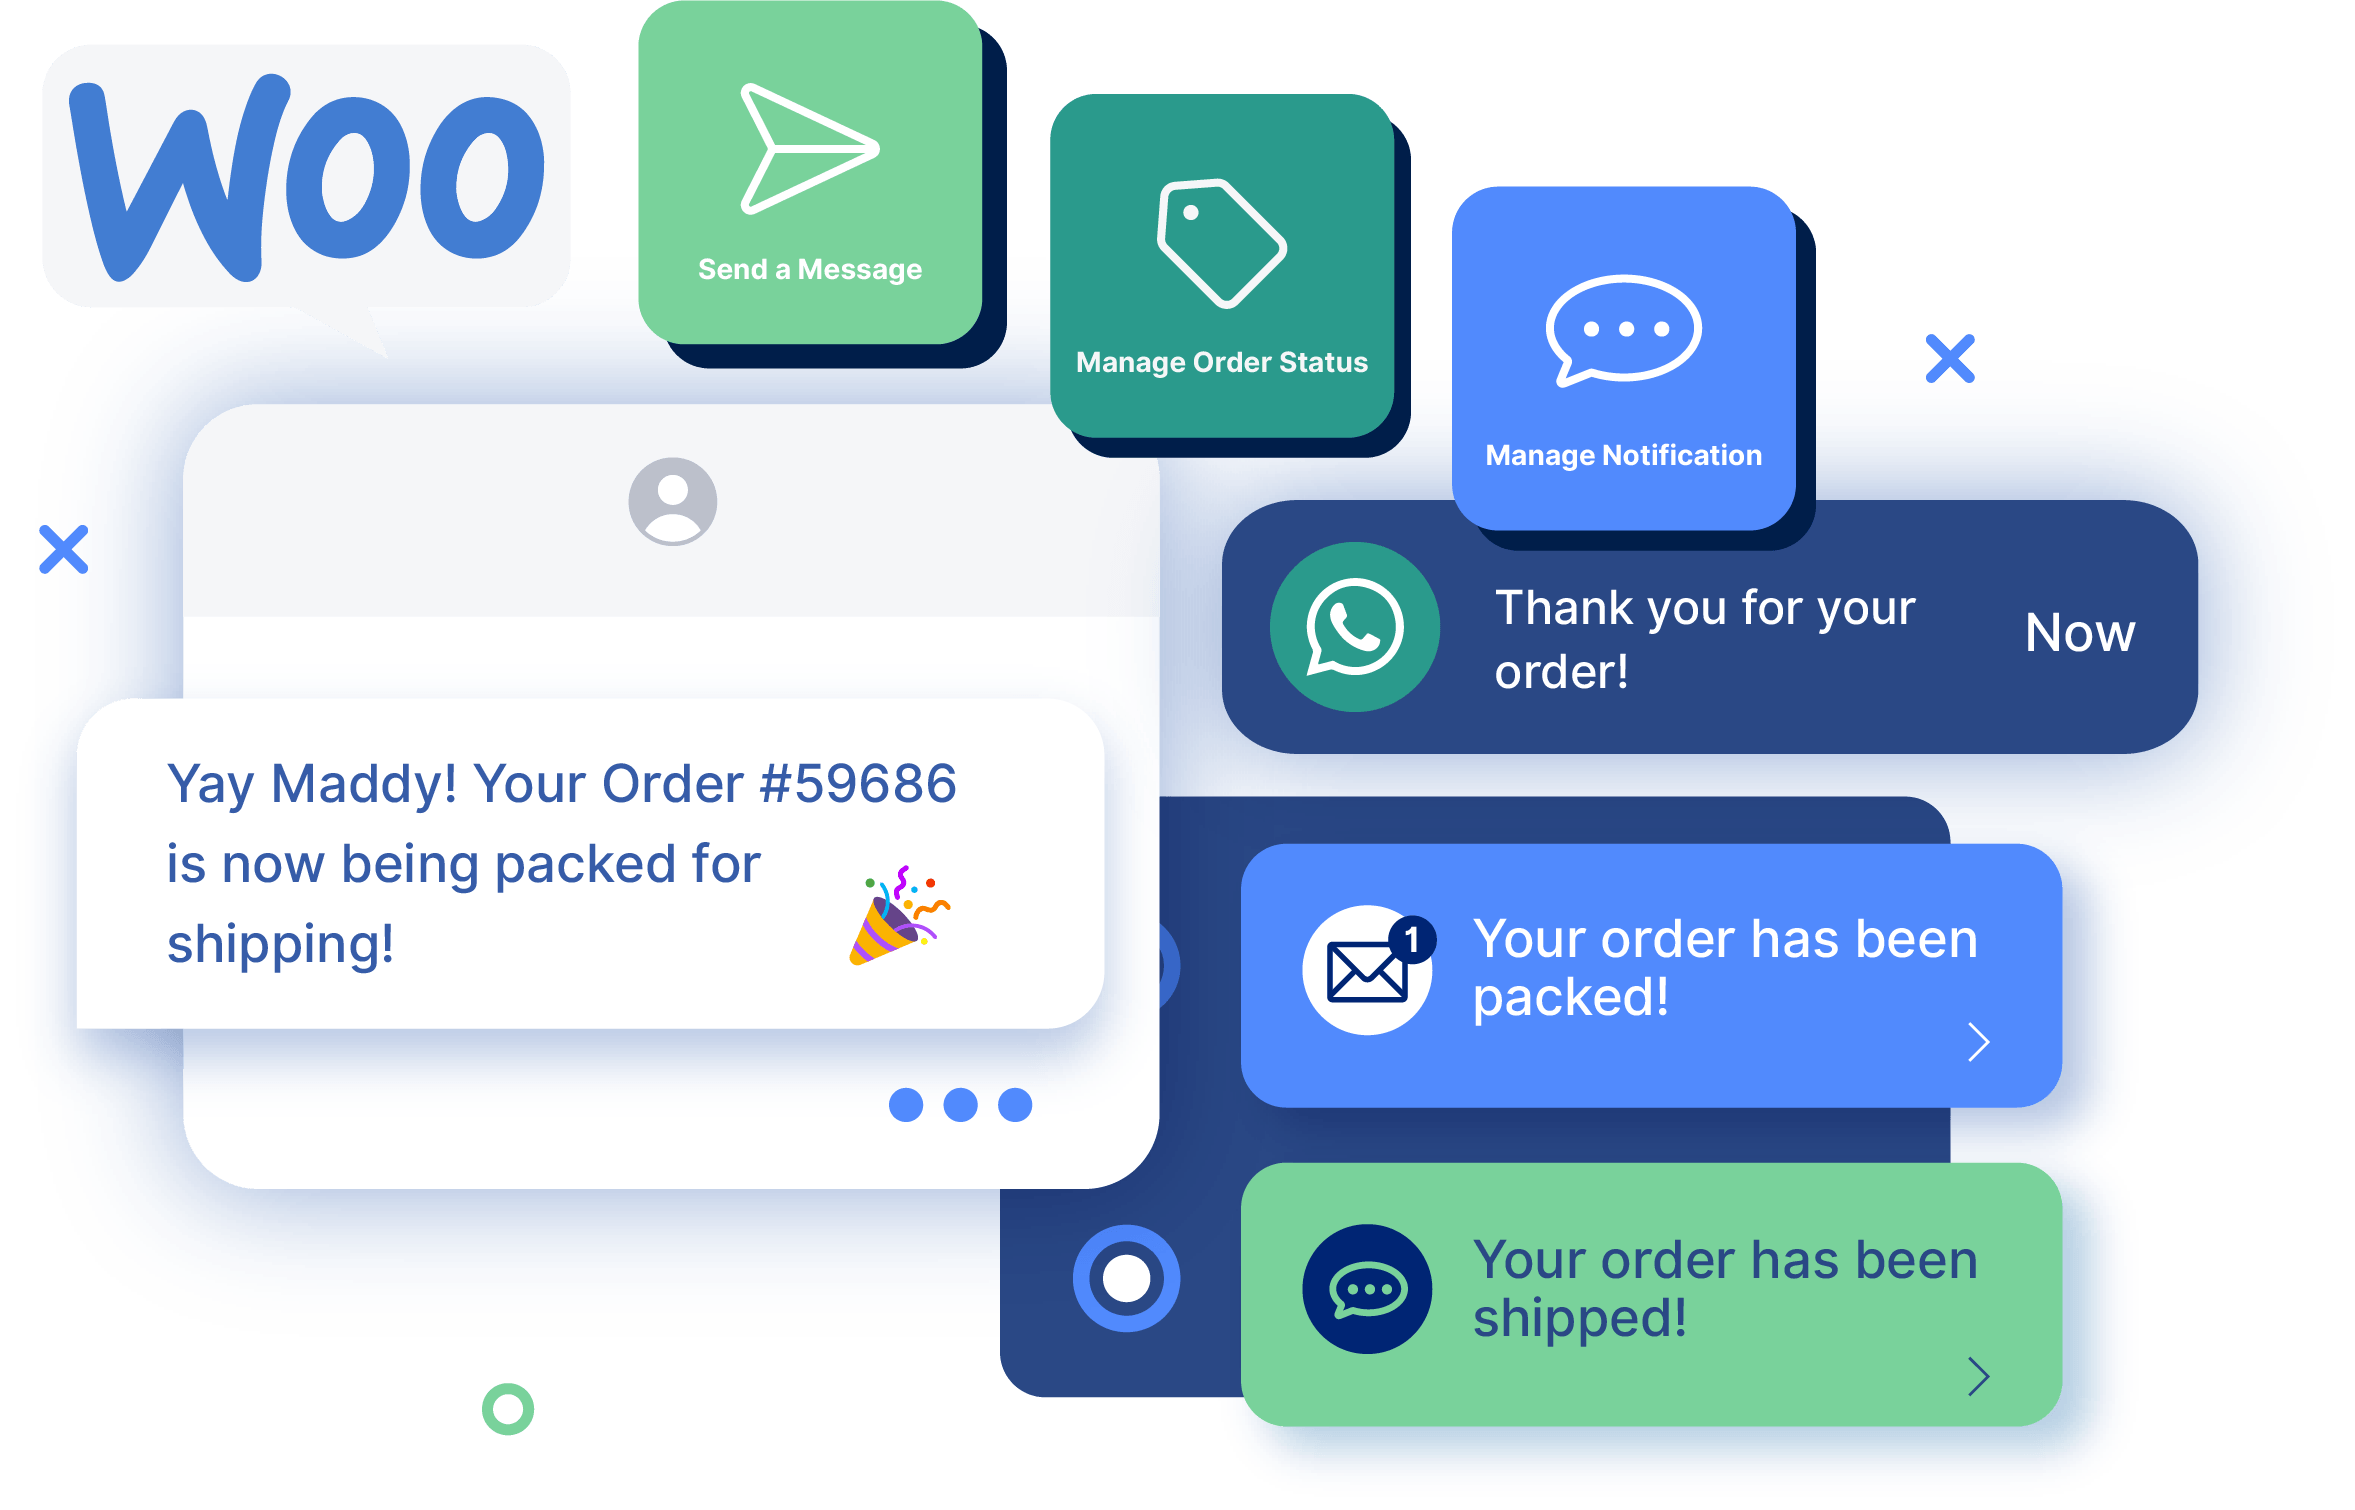
With plugins like Flow Notify, custom order statuses become even more powerful. You can automate updates and notifications to be triggered by specific order statuses.
This means that your customers will automatically receive a custom email or SMS update when their order status updates. Automations like these ensure consistent communication with your customers and also reduce the number of manual tasks associated with customer updates.
Reporting and analysis
Custom order statuses can significantly enhance your store’s reporting and analysis capabilities by providing a more granular view of your order process, ultimately resulting in more detailed reports – like order fulfillment reports, sales reports, and inventory management metrics.
You can track the time orders spend in each status, identify common issues, and measure efficiency across different stages of your process. This detailed insight can be invaluable for identifying areas for improvement and making informed, data-driven business decisions.
Personalized customer experience
Custom order statuses can be tailored to specific business requirements or niche products, providing a more personalized experience for your customers. Some examples include:
- Pre-order business: A ‘Pre-Order’ status can differentiate pre-orders from regular ones, helping manage expectations around dispatch times.
- Made-to-order products: An ‘In Production’ or ‘Being Crafted’ status can provide customers with clear communication about the stage their unique product is at.
- Subscription box service: A ‘Box Being Curated’ status might be helpful for subscription box businesses to let subscribers know their boxes are being prepared.
- Digital products: An ‘Awaiting Activation’ status can indicate the time between purchase and when a digital product or service becomes available.
- Food delivery service: Restaurants or food delivery services might benefit from ‘In Kitchen’ and ‘Out for Delivery’ statuses to provide real-time updates to their customers.
- Repair services: An ‘Under Repair’ or “Quality Check’ status can be helpful for businesses providing repair services, offering customers insight into the process.
Maintaining effective customer communication is a crucial aspect of any online business, and custom order statuses are pivotal in achieving this. By employing custom order statuses, you can give customers precise updates about their purchases. This creates a transparent shopping experience, enhancing customer trust and satisfaction.
Moreover, custom order statuses streamline order management. They not only allow you to track the order progression efficiently but also automate customer notifications, reducing manual work. This means less time spent on administrative tasks and more time dedicated to growing your business!
How to create and add custom order statuses with Flow Notify
Ready to take your WooCommerce store to new heights with custom order statuses? Enter Flow Notify – a robust WordPress plugin that allows you to surpass WooCommerce’s default order statuses. With Flow Notify, you get the freedom to create and manage as many custom order statuses as you need, providing you with the flexibility and control to tailor your online store precisely to your business’s needs.
Below, we’ll guide you through installing and setting up Flow Notify, and how you can use the plugin to create new custom order statuses.
Installing and setting up Flow Notify
- Download the Flow Notify extension from your WooCommerce dashboard.
- Go to Plugins > Add New > Upload and select the ZIP file you downloaded.
- Click ‘Install Now’ and then ‘Activate Plugin.’
Creating new custom order statuses using Flow Notify
- From your WordPress dashboard, navigate to Flow Notify > Order Status.
- Click ‘Add Order Status’. This brings up an Order Status Data page with several fields to fill in. These settings will only appear on the backend of your store, so adjust them according to your preferences.
- Add the order status name, slug, and description to the corresponding text fields.

- Adjust the appearance to your liking by selecting from the Text Color, Text Background Color, and Icon Action options.

- Next, you’ll need to begin building out your order workflow. To do this, click the ‘Next Statuses’ dropdown menu, and select which statuses follow which.
- Once you’ve set up your custom order statuses, they will automatically appear in the menu of your WooCommerce orders when you click a single order to edit.
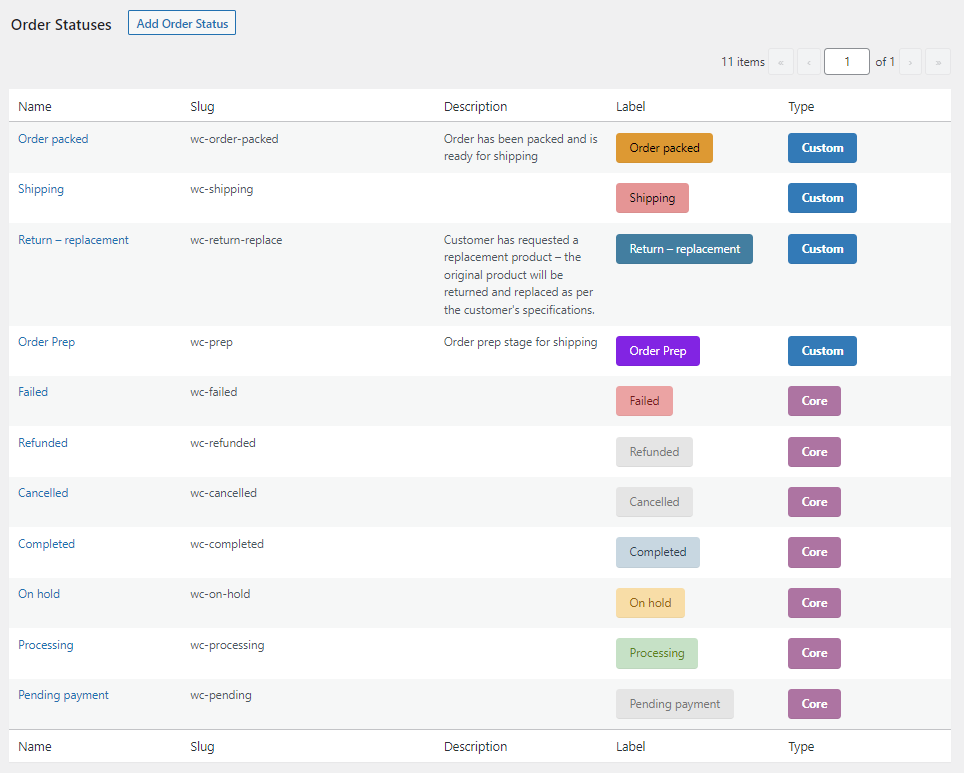
- To add your new custom status to the Bulk actions list on your Orders page, simply check the ‘Allow option to be enabled in Order List bulk actions’ box that appears next to Bulk Actions.
Configuring order notifications
Flow Notify offers the ability to configure notifications for custom and default order statuses, which means you’ll always be able to keep your customer informed about their order progress. Flow Notify also allows users to set up automatic notifications via WooCommerce SMS text, WhatsApp, and email whenever an order status updates.
Here’s how you can use Flow Notify to set up automatic notifications for order status changes:
- From the dashboard, navigate to Flow Notify > Notifications, then click ‘Add.’
- Add a name and recipient of the notification, and select the delivery method (email, SMS, or WhatsApp).

- Fill in the information fields, including the notification text, using the supported data fields such as Product Name and Order Status. This will ensure the correct information appears on your customers’ notifications.
- Set the notification trigger to ‘Order Status Changes’ and select what status the order must change from and to in order to trigger the notification.

- That’s it! Your new notification will be sent automatically based on the trigger you configured earlier.
Get Started with Flow Notify for improved rrder management
WooCommerce gives users access to seven default order statuses – and while they’re useful, each online business is unique, and there might be cases where the standard order statuses just don’t cover your specific needs.
By using Flow Notify, you can create custom order statuses tailored to your specific business needs, enhance customer communication with personalized and timely notifications sent via their preferred communication channel, and streamline your order management process through automation. All of these improvements contribute to a better customer experience, increased satisfaction, and, ultimately, the success of your online store.
Seize the chance to streamline your WooCommerce store’s order management system with Flow Notify and experience how the plugin can elevate your order management process. Get started with Flow Notify, and begin your journey to enhanced eCommerce efficiency.