
Tutorials
What Are WooCommerce Order Statuses, and How Do I Use Them?
Dec
Are you looking for an easy way to keep track of the entire order fulfillment process for your WooCommerce store? If so, you’re in luck – the popular eCommerce platform already comes with a few built-in features that can help both store owners and customers keep on top of order statuses.
As of 2020, 90% of all retail orders had at least some in-store involvement in their fulfillment. Having a robust fulfillment strategy can greatly impact a store’s efficiency, not to mention improve customer experience and increase sales.
A default WooCommerce installation already comes with a number of order statuses that can aid store owners in organizing their fulfillment process. However, there is a problem: most businesses have their own unique spin on how they handle their orders! This is why many companies choose to extend WooCommerce’s default functionality to gain more flexibility when managing their order statuses.
In this article, we will take a look at the default WooCommerce order statuses and how to manage them. Then, we will show you how to get the most out of order statuses in WooCommerce using our recommended plugin.
What Are WooCommerce Order Statuses?
So, let’s start with the basics. What are order statuses, and how do you use them within WooCommerce?
Order statuses are labels that you can assign to your WooCommerce orders to indicate which stage they are currently at. The purpose of this is twofold: to help fulfillment staff keep track of all orders, and to keep customers updated about the progress of their purchases.
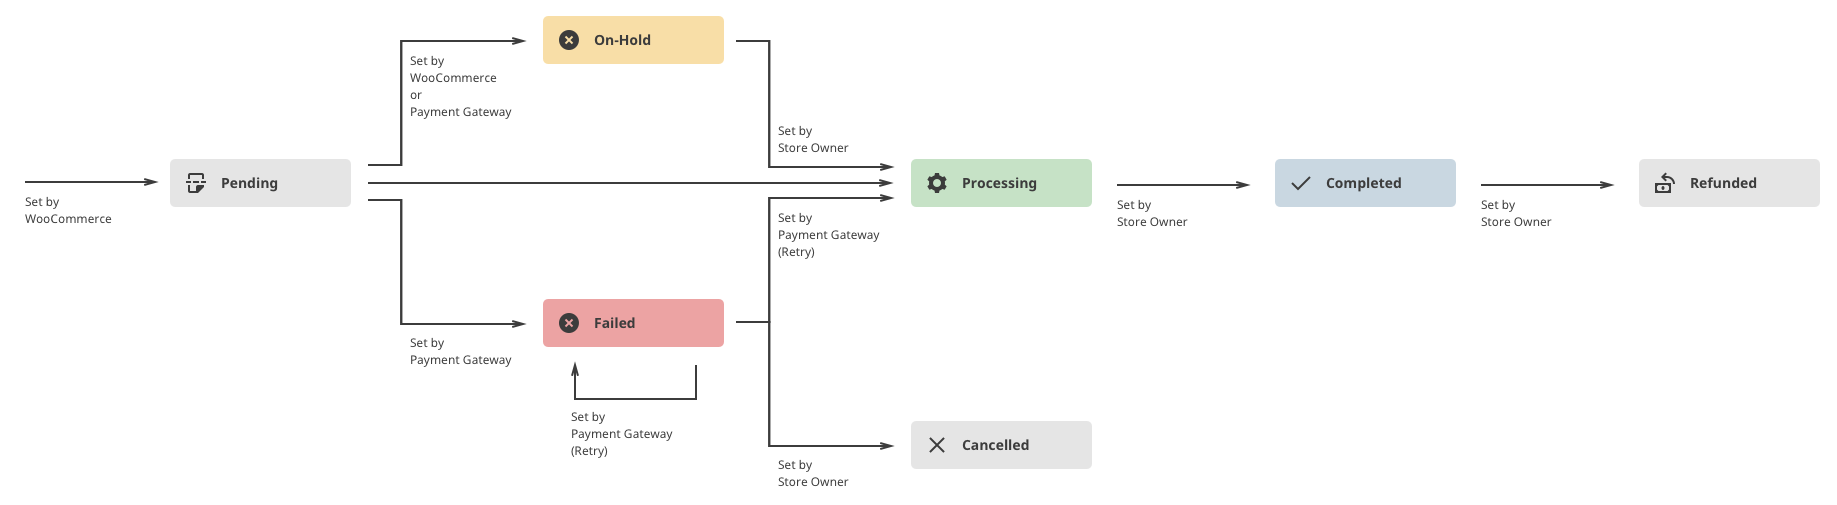
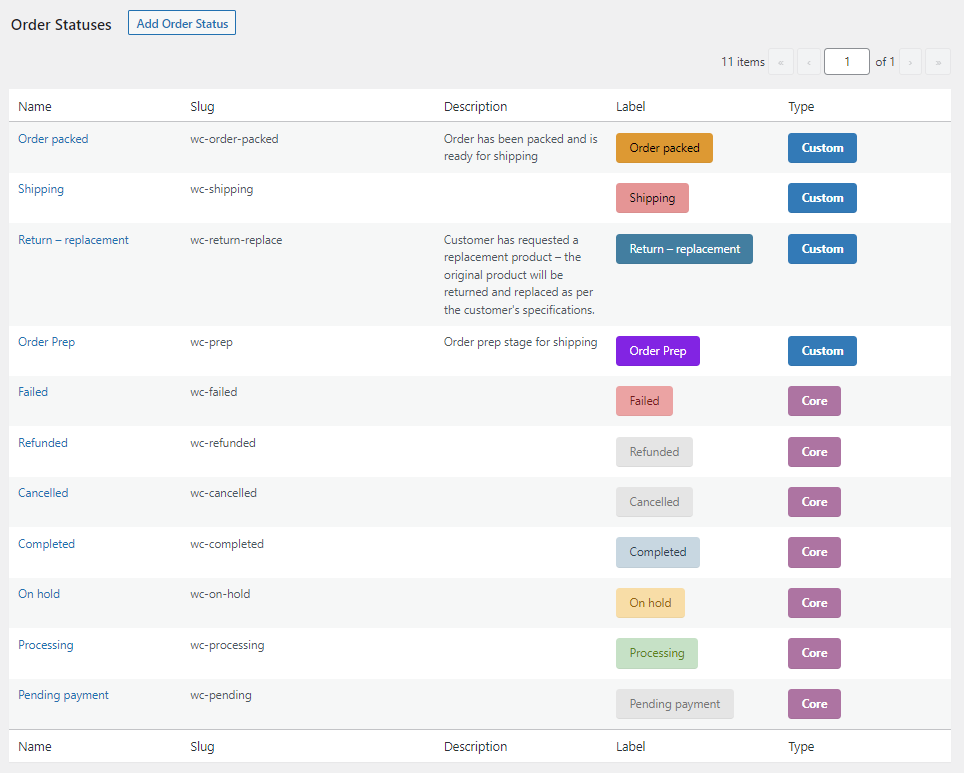
WooCommerce offers seven default order statuses. While some of these will be automatically assigned by the plugin depending on an order’s progress, others need to be manually set by the store owner or shop manager. The statuses are:
- Pending Payment: This indicates that an order has been received, but no payment has been made yet for it. This is one of WooCommerce’s automatically set statuses. As soon as the customer pays for the item, the order will update to ‘Processing’ on its own. If no payment is received, then it will update to ‘On hold’ or ‘Failed’.
- Failed: This status is automatically set when a customer’s payment for an order fails, is declined (unpaid), or requires further customer authentication (SCA). One important thing to note about this status is that it may not show immediately, depending on your chosen payment gateway. For example, when it comes to PayPal payments, the order status will show as ‘Pending payment’ until verified.
- On Hold: This indicates that payment requires confirmation from the store owner before the status can be changed to ‘Processing’.
- Processing: In most cases, this order status is automatically assigned once payment has been received. The exception is ‘On hold’ orders, which need to be manually changed to ‘Processing’ by the store owner. If your WooCommerce store sells virtual or downloadable products, the processing stage is skipped entirely, and the order status automatically updates to ‘Completed.’
- Completed: Aside from the case of virtual products (as we mentioned above), the complete order status needs to be set by the store owner or fulfillment staff when an order has been fulfilled and completed.
- Canceled: The canceled status needs to be manually set by the store owner as well. This indicates that the stock level has been returned to what it was before the order was placed, and no further action is required.
- Refunded: If an order needs to be refunded after completion, a store owner can manually set this status to indicate that the request has been processed and there’s nothing else to be done. Many payment gateways will automatically set this status once a refund is processed through the WooCommerce order details page.
How Do You Manage Order Statuses in WooCommerce?
Managing the status of your WooCommerce orders is a very straightforward process and can be done directly from the order page on your WordPress dashboard. All you have to do is navigate to WooCommerce > Orders, where you’ll see a list containing all your orders. The dashboard also shows a breakdown of where all of your orders are in terms of fulfillment (or their statuses).
Using this order list, you can filter orders by date or type of order (online or in-person), and status. You can also make any required order status changes manually, either individually or in bulk. All the bulk options are grouped within a dropdown menu at the top of the page. To edit orders one by one, just click on them.
Can You Create Custom Order Statuses in WooCommerce?
The core order statuses that come with WooCommerce by default are a great starting point for keeping track of your order fulfillment process. However, if you want your online store to offer more custom services (or if you want to keep your customers updated about where their orders are up to at a more granular level), adding custom order statuses can be extremely helpful.
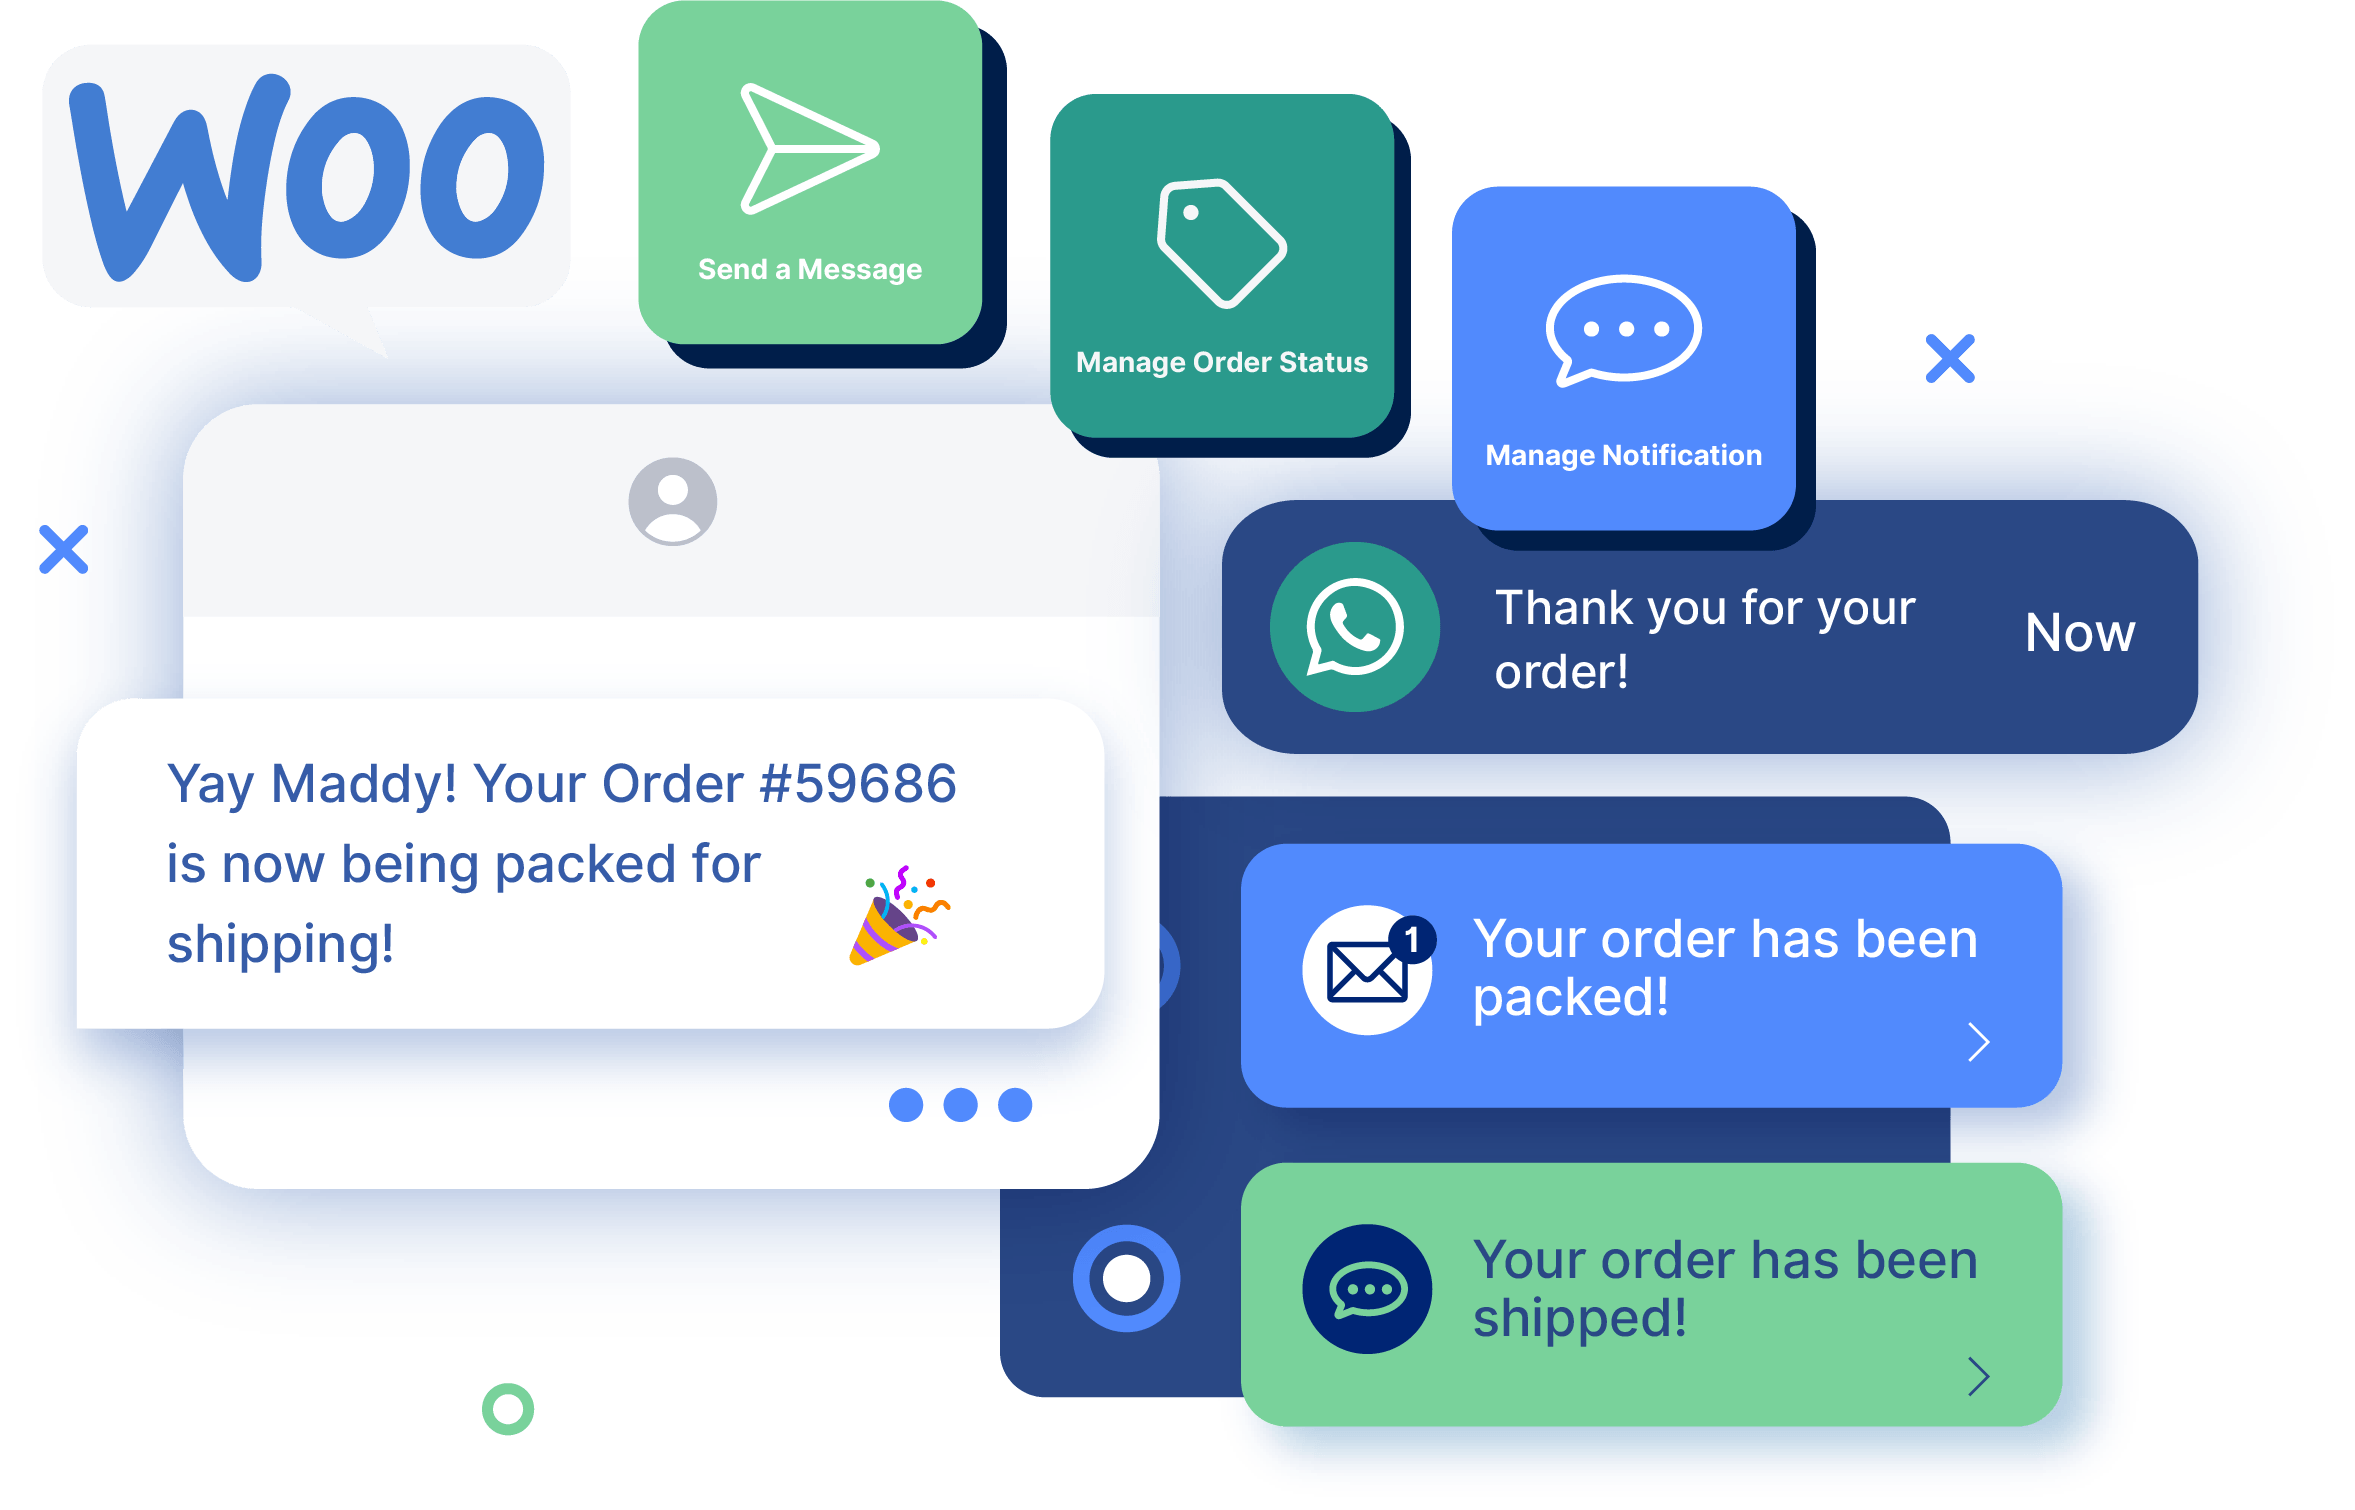
The easiest way to do this is to use a WooCommerce plugin like Flow Notify. With Flow Notify, you can create and manage your own custom order statuses but also access a wide range of advanced features to help bring your order fulfillment process to the next level!
Before we show you everything Flow Notify can do for your online store, let’s take a look at how you can use this plugin to add custom order statuses. This is what you need to do to get started:
- First, purchase, download, and install the plugin.
- Go to your WordPress dashboard, navigate to Flow Notify > Order Status, and click on ‘Add Order Status’.
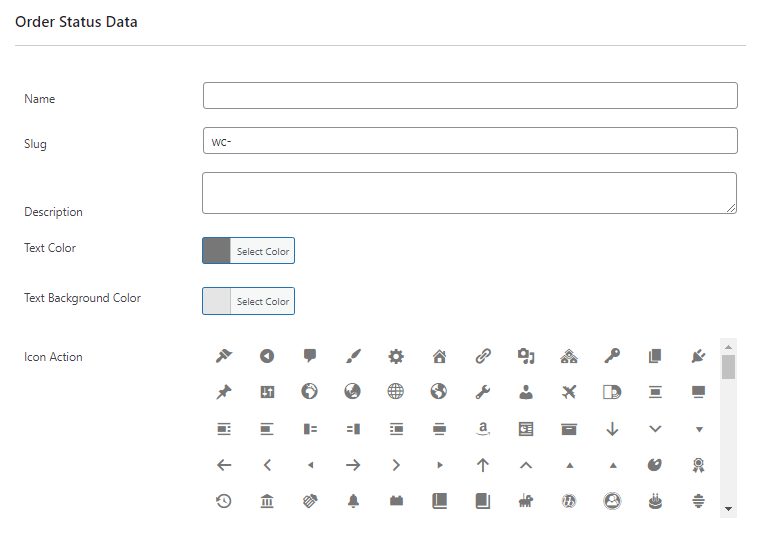
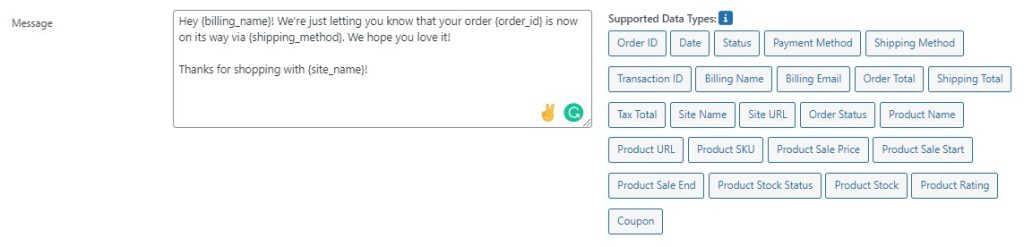
This is where you can customize the status to meet your requirements. For example, you can add a name and a description and adjust the whole thing’s appearance on the back end of your store – making choices for display color, icon, and more.
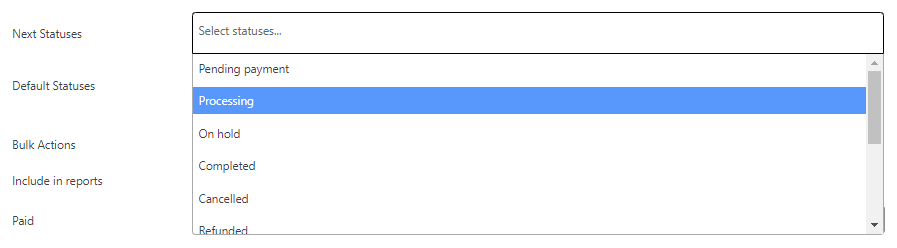
One crucial component of your order process you can configure is where the status appears in your fulfillment workflow. You can change this by selecting which statuses follows which. To get a general overview of the flow, you can use your WooCommerce dashboard and the order status dropdown list. Just choose the appropriate ‘next status’ and place it into your workflow exactly where you need it.
You can also decide whether your new custom status will appear in the bulk actions list – which will allow you to change multiple orders to the custom status at once – and choose whether this status should appear in your WooCommerce reports.
That’s all you need to do! Once you’ve added your new order statuses, you can use them to help better manage your order fulfillment process. And the best part is, you can add as many different order statuses as you need. This means that you can create a process that is unique to you and your business!
How To Get More Out of WooCommerce Order Statuses Using Flow Notify
As we’ve already touched on, the default WooCommerce order statuses are a helpful tool for keeping track of your orders and allowing your customers to do the same. However, they won’t provide much functionality beyond that. This is where Flow Notify comes in handy, as it includes a variety of built-in features that allow you to streamline your WooCommerce order fulfillment process. So, let’s go through them in some more detail.
Keeping Your Customers and Staff Updated
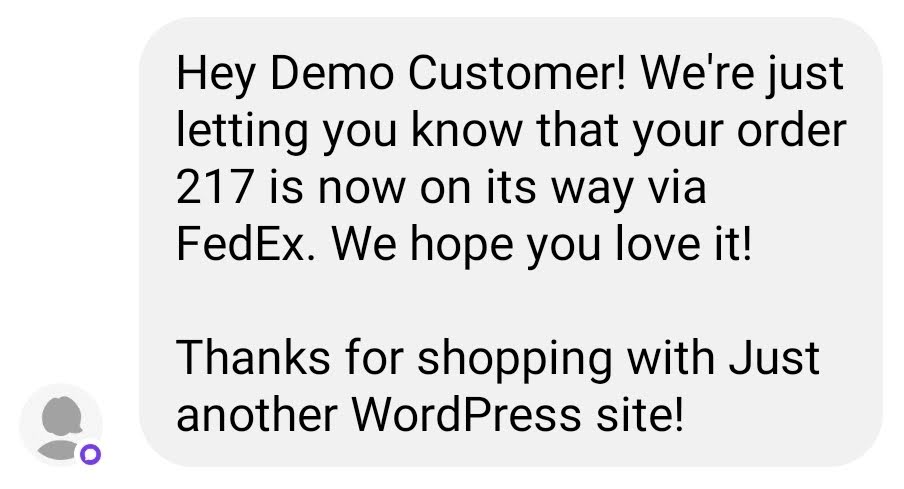
With Flow Notify, you can automatically send notifications to your customers and fulfillment staff at determined stages of the order process chosen by you. You can customize these notification messages using WooCommerce data fields, which will pull in details such as order ID, payment method, and more. You can also use these fields to add coupon codes to be sent to your customers, encouraging repeat orders!
There is no limit to how many custom email and SMS notifications you can set up using Flow Notify, and there are new integrations being added to the plugin all the time. You aren’t limited to sending notifications to customers, either; for example, you could use Flow Notify to automatically inform your staff when a product payment has been received or when all of the stock for an order has been picked and packed and is ready to be shipped.
Taking Granular Control Over Your Order Fulfillment Process
One of the main advantages of using custom order statuses and notifications is that Flow Notify allows users to take more control over each individual stage of the fulfillment process.
By adding more detailed custom order statuses, you can ensure every fulfillment team member and all customers always know exactly where orders are. This gives you unparalleled control over both your product lifecycle and your business’s customer experience.
Streamlining Your Fulfillment Operations With Automation
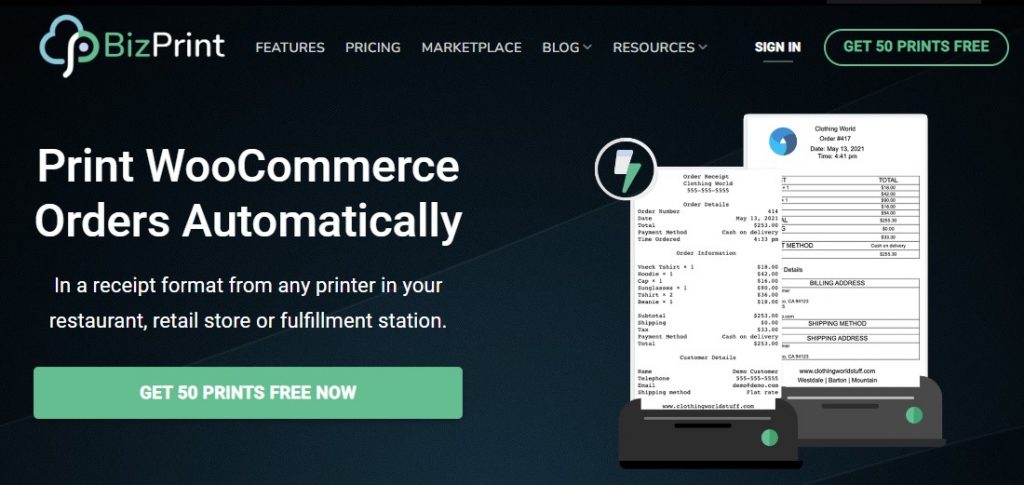
We’ve gone through how Flow Notify can help to keep your customers and staff in the loop with automated messages. But there is more! By combining Flow Notify with BizPrint, its sister plugin from BizSwoop, you can take automation to the next level.
If there’s one thing you want to avoid when processing orders, it’s the possibility of human error. While Flow Notify can take care of keeping everyone informed about order status updates, BizPrint allows you to automatically print any relevant fulfillment documents when you need them the most, based on a set stage of the process you define using an order status.
By pairing BizPrint and Flow Notify, you can print anything from shipping labels or packing slips to delivery notes, credit notes, and other important documents at the stage that works best for your store.
Let’s look at an example. Imagine one of your customers wants to return an item of clothing to your store because it doesn’t fit and they want the next size up. Using Flow Notify and BizPrint together, you can easily create a ‘Return – replacement’ status, which, when selected, triggers the automatic printing of a packing slip for the replacement order. This slip could even be accompanied by a separate PDF print of a return shipping label to be sent to the customer so they can return their unwanted item. Lastly, to ensure the best possible customer experience, you could set up an automatic notification to let the buyer know their return is being processed and give them instructions about what to do next.
Level Up Your Fulfillment Workflow
Although WooCommerce offers seven default order statuses to help you manage your fulfillment of product orders, these might not give you enough flexibility to manage your business the way you want to. To get the most out of these order statuses (and to create custom statuses that fit your store’s needs), you should consider using a plugin.
Flow Notify is the perfect choice to take complete control over your fulfillment workflow:
- Set up and trigger automated notifications via SMS, email, and more (coming soon).
- Use custom notifications to keep your staff informed about all orders and let your customers follow the journey of the products they have ordered.
- Connecting Flow Notify with BizPrint to easily print order fulfillment documents at precisely the stage you need them, saving you considerable time and effort.